
Projects are containers for your source code, icons, images, and data files. Before performing any work in VS Code, you must first create projects to store your work. Doing so will set up the framework for your app or website.
Creating new projects in VS Code is similar for all programming languages. However, being more of a code editor than an IDE, you do not have pre-installed templates for creating projects. Instead, you have to install extensions and run the syntax in the console.
How to Create a new C# project
-
- From the sidebar, select the Extensions tab. Next, search for C# in the search box and click the Install button.

Install C# extension from the VS Code extensions marketplace. - Download and install .Net Core from dotnet.microsoft.com/download

Download Dotnet Core from dotnet.microsoft.com/download. Install it with default configurations. - From the “Explorer” pane in VS Code, select the Open Folder button.

From the Explorers tab on the sidebar, select Open Folder. - Create a folder in your preferred directory to store your programs. For example, I will choose “Practice.”

Open the folder from the preferred directory. - From the top-level “View” menu, select Terminal.

Select View menu and then choose Terminal. - To create a new C# project, run the following command in the Terminal:
dotnet new console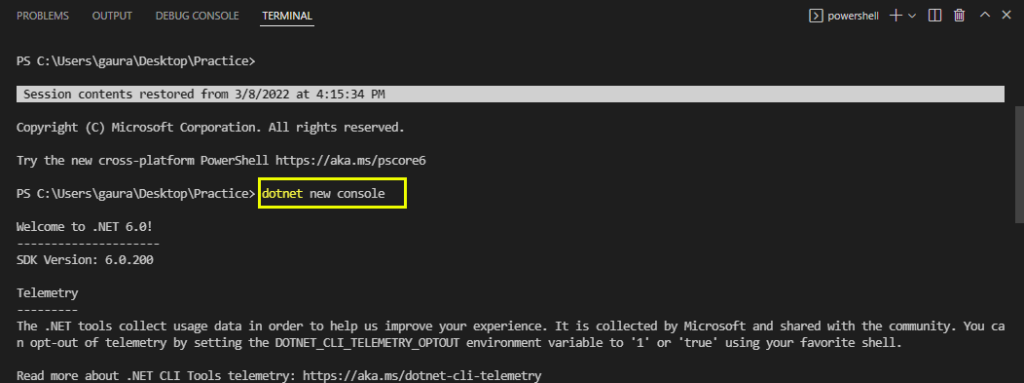
In the console, enter this command and hit Enter: dotnet new console. - You will find multiple files inside your folder in the Explorer pane. These files will have a simple template to let you start working on your C# project.

You will find the C# project with templates on the Explorer pane.
- From the sidebar, select the Extensions tab. Next, search for C# in the search box and click the Install button.
How to create a new Python project
Like we installed an extension for a C# project, we will also need an extension for Python.
- Open the Extension pane from the sidebar or press CTRL + Shift + X.

Search for Python in the extensions pane. - Search for Python in the search box and select Install.

Install Python Extension. - Download and install Python from python.org/downloads. You can follow the Python walkthrough to install Python.

Download and install Python with default configurations. - Open your pre-made python project folder from its directory.
From the Explorers tab on the sidebar, select Open Folder. - Press CTRL + Shift + P and enter Python: Select Interpreter in the command palette to choose the Interpreter.

Enter “Python: Select Interpreter” in the command palette to configure the Python interpreter.
Python project is now established in Visual Studio Code. Now you can create new files inside the folder and run your codes.
How to create a new Java project
- First, we will need to install Java Extensions Pack from the Extensions tab.

Install Java Extensions Pack from the extension marketplace. - Next, select the Explorer tab from the sidebar and select Create Java Project.

Select the Create Java Project button from the Explorers tab. - VS Code will now present a palette to select the project type. Next, choose the No build tools option.

Select the No build tools option as the project type. - Choose the preferred directory to store your work. For example, I am choosing a folder named “Practice”.

Choose a preferred directory to store your files. - Give your project a name, then hit Enter.

Enter a project name. - Now, we can find our project on the Explorers pane with all the source files inside it.

A Project structure will appear on the Explorers tab.
How to create a new NodeJS project
- Create a JavaScript file by left-clicking on the New File button. In this example, we will name the file app.js.

Create a JavaScript file by clicking on the New File icon. - From the top-level “View” menu, choose the Terminal option.

Choose the Terminal option from the View menu. - In the terminal, enter the following command:
npm install express.Hit Enter.

Type and execute the following command in the terminal: npm install express. - Then, enter the following command:
npm install nodemon.Hit Enter.

Type and execute the following command in the terminal: npm install nodemon. - Now, we can find our project structure in the Explorer pane.

You will find the Project structure on the Explorer pane.