
Pushing code to GitHub means moving your code files from a local repository to a remote GitHub repository. This guide shows how to push code from the VS Code terminal to GitHub.
Step 1: Install Git
Install Git
Firstly, you need to have Git installed on your system. Git will give us the underlying technology which powers GitHub. Go to git-scm.com/downloads and choose the download for your operating system. Then, install it with default settings.

Sign up for a GitHub account
Secondly, make sure to have an account on GitHub. Go to github.com, and sign in to your account.

Step 2: Create a new GitHub repository
- Log in to your GitHub account.
- Click on the + icon on the top right to create a new repository.
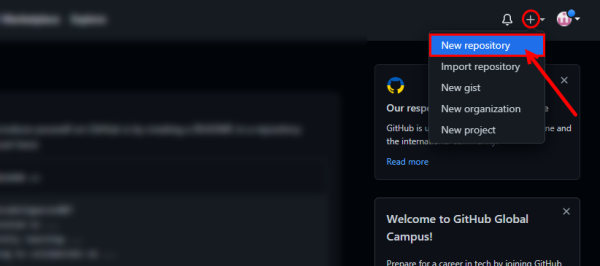
Click on the New Repository from the “+” icon. - Enter a repository name and click on the Create repository button.
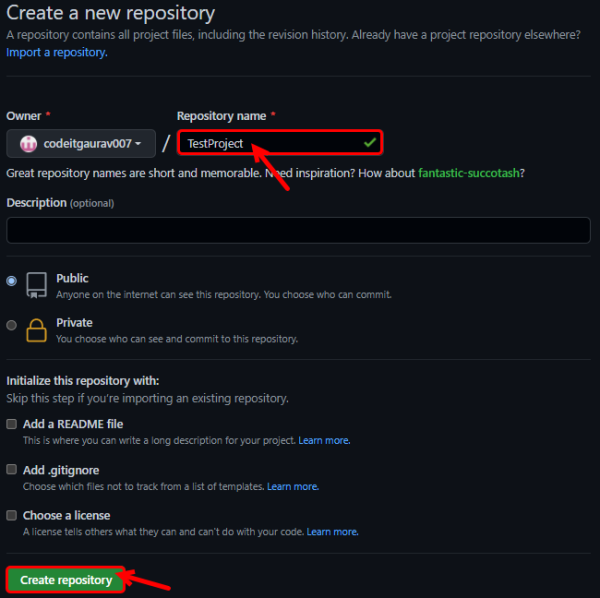
Name your Repository, then click the Create repository button. - Once your repository is created, copy the web URL. This URL allows us to push code to this repository from VS Code.
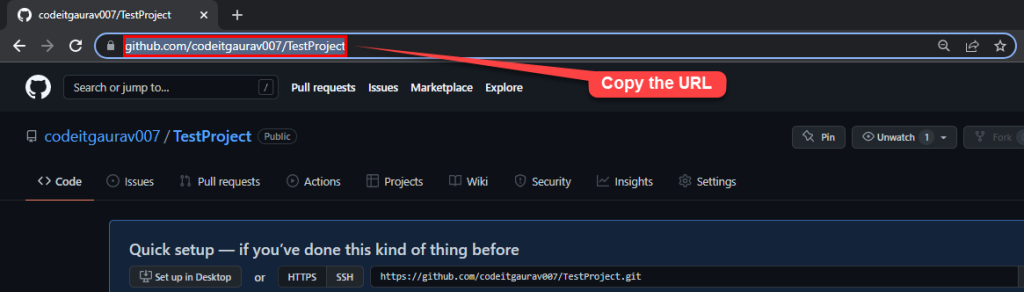
Copy the Repository URL.
Step 3: Open your project within VS Code
- From the “Explorers” tab in the sidebar, click on the Open Folder button.
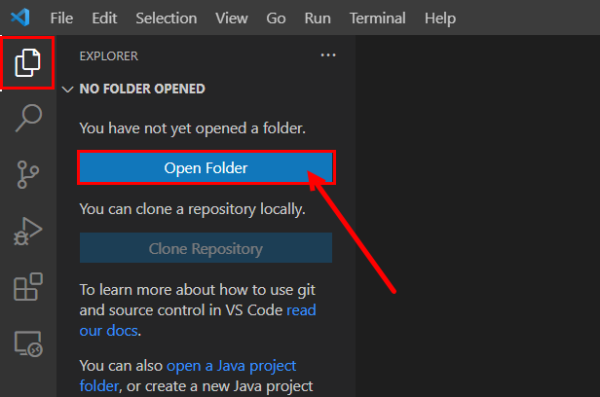
Click on the Open Folder button from the sidebar. - Open the folder from your preferred directory.
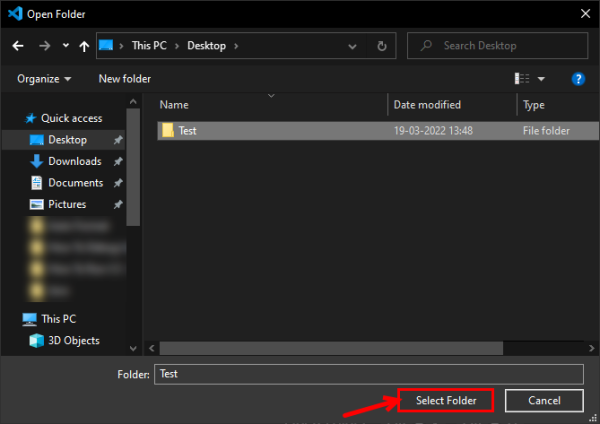
Open the folder from your preferred directory. - Once the folder is opened, you’ll see all the source files.

Source Files inside the folder. Note: Make sure all the code files are in one folder, as you’ll have to push the entire folder to GitHub.
Step 4: Commit the code files
- Click on the Initialize Repository button from the “Source Control” tab in the sidebar.

From the Source Control tab, select Initialize Repository. - Now, under the Source Control panel, enter any commit message. For example, I will name it “First Commit”.
Then, click on the ✓ icon next to Source Control heading or press Ctrl + Enter.
Type any commit message and press Ctrl + Enter. - When prompted with a pop-up, choose Yes.

Click on the Yes button.
Step 5: Push code to GitHub
- Inside the Source Control panel, click the Overflow button (it has the ellipsis icon). Then, from the Pull, Push menu option, select Push to.

Click on the three-dot (ellipsis) icon. Next, select Pull, Push from the list of options, then select Push to… - You will be prompted to add a remote. Click on the Add Remote button.

Click on the Add Remote button. - A new window will appear. Paste the copied GitHub repository URL and press Enter.

Paste the GitHub Repository URL that we copied from GitHub. - Then, type any remote name and press Enter.

Give any name to the remote. - Open the Push to sub-menu option again. Then, choose your repository path and press Enter.

Choose the option according to the GitHub URL or the remote name. - A pop-up will appear to log in to GitHub. Choose which option you’ll use to sign – I’m using my browser.
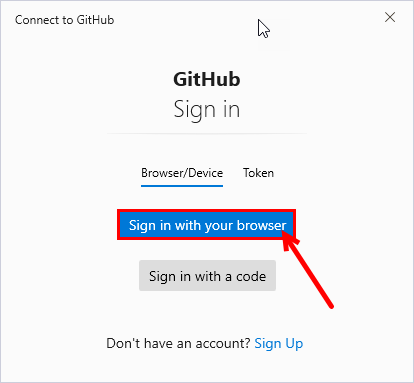
Select the Sign in with your browser button. - An authorization page will pop up in the browser. Click on the Authorize GitCredentialManager button.

Click on the Authorize GitCredentialManager button. - Enter your GitHub password.

Enter your password. - Finally, refresh your GitHub repository URL.

The source files have been uploaded to the GitHub repository. You will notice that the codes are successfully pushed to GitHub from your local repository!
I’m getting error when i try to push my code to git, I followed all the above steps.
The only step i missed or i didn’t get is Step 4 3rd point. It didn’t prompted a pop-up window
Thank you!